There have been a couple of requests for a tutorial on how I make my quilt labels. I've contemplated doing that. The dilemma has been what would the tutorial include? I use a commercially available digital scrap booking program to create my labels, but I don't think you want to see how the program works. So I'm going to take the approach of showing you my thought process in putting together my quilt labels. Along the way, I'll try to explain the digital elements available, where you can get them, and how to use them in your own programs.
I use My Memory Suite software to create my labels. (This is not an affiliate link, I'm just sharing the link as this is the software I use).
But you can use other programs. I published a tutorial last year about creating printable panels and labels using Microsoft Word. When I first started making labels, I used Microsoft Publisher as it has more tools for working with photographs than Word had at the time. Photoshop Elements is another place you can create labels, but I'm not very well versed on that part of the program. For this tutorial, I'm going to stick with My Memories Suite and Microsoft Publisher.
I've created a My Memory Suites file that I use as a template for my labels, mainly as it is already set up to the right size (4" X 5"). So I open the program, then open that file. Here's the starting screen:
So now I have a blank canvas. Where to next?
Step 1: Concept/Color
Since I haven't started on a label for this month's UFO, the Red, White and Blue Stars, that's going to be my example. This is definitely a patriotic quilt, so I'm sticking with red, white and blue as my color palette. Now that I have a rough theme and color scheme, what next?
Step 2: Select a background
I search the program library for the backgrounds I've purchased. Lighter colors usually work best, so I searched my digital paper files to find something white and came up this:
You can check Pinterest or Google for places that offer free downloadable digital papers used for digital scrap booking. Or you can find sites that sell digital scrap booking kits, that have background papers and digital elements to play with. My Memory Suite has a large number of these kits. Prices can range from less than a dollar for a set of backgrounds to $20 for a kit by a well known digital element artist. You do not have to have the program to use these items, you can download them as .jpg or .png files, then use them like photos in any program that supports graphics. Or you can create your own backgrounds and elements by scanning/photographing wrapping papers, magazine papers, etc. If I download the background papers from the My Memory Suite kit used above, this is what it looks like in File Explorer. The file was downloaded as "General".
Step 3: Add the text
Once I've decided on a background, I add the text boxes, decide on a font, and add the text.
I'll come back later and play with the font, text size and color once I've selected the other digital elements.
Step 4. Add the digital elements.
This is the fun part of the process. I add and subtract elements until I like what I've got. Very often, I'll search my element library and add all the elements I can find. Then I'll duplicate the page then start removing and rearranging the elements.
All the different pages created are shown along the bottom of the screen. The first page has all the digital elements, the following pages were duplicates where I got rid of all but the elements I wanted to play with. Here's what some of those elements look like in my File Explorer after being downloaded from My Memory Suite using the "General" file format.
So with the backgrounds from above and these elements, I can create a label in Microsoft Publisher that looks like one from the program.
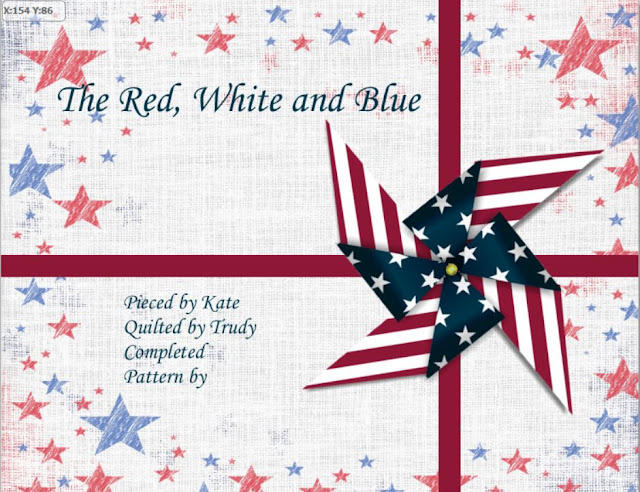
Here's the My Memory Suite version.
The difference between the two is the red and blue stars "overlay". It wasn't an element in the kit I downloaded. Had it been, I could have created the exact same label in Publisher. If you don't have Publisher, Microsoft Power Point has decent graphic tools as well. I'm not sure how well this would work in Word. You could definitely add the background and the text. Adding in additional elements probably wouldn't work very well. Though I've not tried that. If you give Word a go, please share your experience in the comments.
That's how I create my quilt labels. I like My Memory Suite, it has some very nice functions that speed up the creation process. But Publisher was my go to program for many years. Over the years, I've acquired a number of photo scrap booking kits, so I have lots of purchased backgrounds and elements to play with. I've also created labels using elements created from my own photographs. That takes more time, but it can be worthwhile if I'm after something very specific. Creating your own elements is definitely another tutorial.


15 comments:
If you have questions, leave me a comment.
Thanks for the explanation. I never thought about using standard publishing software to create a label. Do you any product to set the color after printing?
Great tutorial - I have been hoping to learn more. The label is so nice.
I've always admired your labels - so unique! Thanks for explaining how you make them.
Nice job...and I like that label. Looks great!
I never thought about making digital labels (which is crazy, considering how much graphic design work I do). I have all four of the programs you reference. Of them, Publisher is my favorite to work with. I like that I can use a lot of the overlays, backgrounds and clip art from Memory Suite with Publisher. Power Point is a little more cumbersome to use (in my opinion), but you can accomplish the same things. I do NOT like using Word with graphics, because you don't have a lot of the same freedom to manipulate. But then I'm highly biased in Publisher's favor!! Great tutorial! :)
Thanks for the tutorial, Kate! SEW much neater than my handwritten labels.
What size do you usually make them? btw, that is so cute.
Super helpful tutorial, Kate, thank you! I am always impressed with your labels!
Great tutorial, your labels are so beautiful!
Checking out the comment email solution
That is so neat! Is the program set to transparency or do you have to do something to make the layers? That is a beautiful label.
Has something changed with the comments? I know I am sometimes getting return email address with wordpress, but I hadn't noticed a change with blogger.
You make beautiful labels, the perfect finish to the quilts.
Hi Kate! Thanks for sharing the link to the post about how you make labels. I never thought about setting up a template in Word or other software. It's just one more creative element that can be layered on the quilt. ~smile~ Roseanne
Post a Comment