Sunday, October 27, 2019

Week 43 of Stitching Stuff

It seemed like our autumn only lasted a week.  Beautiful weather for a week and then wet, cold rain.  There's a possibility of snow flurries next week.  November starts at the end of this week, so I suppose it's time for winter to start creeping in.  Is this the time of year you do more or less stitching?  I find it harder to get in my 15 minutes each day, not due to the weather, but due to wind up activities at work. End of year means lots of reports, end of year closing meetings and meetings to talk about objectives for next year, which translates to lot of overtime.  How well do you do at fitting in your 15 minutes with what ever changes happen in life with the end of the year creeping closer? 


I did OK this week on the stitching front, but several nights my 15 minutes happened just before bedtime. 

15 minute days/week = 7/7 days
15 minute days/October = 23/25 days
15 minute days/2019 = 268/298 days
Success rate = 89.93%

My goal for 2019 was to manage at least 15 minutes of stitching time 90% of the time. If you round, I'm there.  Now can I keep it there with end of year stuff at work and the holidays?  That's going to be a challenge. 

Because I'm working on projects where I've either counted the fabric out already or aren't ready to count the fabric used, the stash report looks really anemic.  So I'm just going to wait and give a report for the whole month of October.  

Our fall colors this year are going to be kinda shabby.  We had a hard freeze seemingly out of nowhere after weeks of warm weather. Most of the leaves are just turning brown and falling off the trees. So my fall foliage photos are going to be pretty lean this year.  I did get one nice shot last weekend. 


I'll probably get out for a walk with My Guy this afternoon.  Hopefully I'll find a bit more color when we get out and about.  

So how did your stitchy week work out?  


1. Julie in GA
2. karen
3. Meloney
4. Chrisknits
5. MaryR @Urban Quilter
6. DawnyK
7. Amanda
8. Shasta @ High Road Quilter
9. Christina's Handicrafts

Powered by... Mister Linky's Magical Widgets.

Tuesday, October 22, 2019

To Do Tuesday - Giving it a Go

With the end of the year looming, I'm hoping to move a few more projects to finished.  I finally realized this weekend that I've got way too many projects in the works at the sewing machine. That means I'm making a little progress on a lot, but not enough to move projects to the finish line. It's time to pare back the number of projects in progress and set some weekly priorities.  

I'm going to try something new with the priority setting. Rosanne and Sue, who blog over at Home Sewn By Us, have long shared their weekly to do list on their blog. They recently started a weekly To-Do Tuesday linky party for others to share their to do lists.  I'm usually pretty good about sticking to my priorities if I've publicly committed to them on the blog. So I'm drafting and sharing a weekly to do list to see if it helps me stick to my priorities.  

To Do List for the Week of October 22nd to 28th

1. Vintage Dresses - Bind

 Vintage Dresses
by 
Charise Randell

The quilt is trimmed and the binding is made.  Now it needs to be pressed, sewn to the front and then hand stitched to the back.  I also need to print out the label so it can be sewn in with the binding.  Finishing off Vintage Dresses is October's One Monthly Goal. With a little over a week left in the month, I need to get moving on this one.  

2.    Mosaic Mystery - Finish clue 2. 

Mosaic Mystery Quilt
from Cheryl at Meadow Mist Designs

All the gold centered blocks are finished and there are only a few more of the beige centered blocks to finish off. I want to get these done so I'm ready for clue 3. 

3.  2019 Christmas Mystery quilt clue 3. 

2019 Christmas Mystery
designed by Carrie Randall (Quilter's Hideaway)

Clue one and two are finished. I won't pick up clue 3 till Saturday morning, but the weekend is the best chance I'll have to get it finished. 

4.  Twinkle Stars - Finish sewing the rows together.

Twinkle Stars
Tutorial by Andrea Feldbush of Soscrappy

There's just a couple more seams to finish off. But there are lots of points to match up, so it takes a bit of time to get the rows pinned together.  

Fingers crossed that I can focus on these four and move at least one quilt to the finish line this week.  You can check out other to do lists over at Home Sewn by Us To-Do Tuesday Linky Party.  

Monday, October 21, 2019

Side Tracked

There were a number of side tracks in the last week.  I skipped posting last Monday as My Guy was in surgery. He's home now and healing well. He can't drive for the next 3 weeks, nor can he lift anything over 5 lbs.  So we've been adjusting to the new normal.  

Besides tackling new to me care giver duties and chores he normally does, I got side tracked with a new project.  The local quilt shop is sponsoring another Christmas Mystery.  I love a good mystery and couldn't resist playing along.  Clue one came out the Saturday before the surgery, so I didn't get to that till this last weekend.


2019 Christmas Mystery
designed by Carrie Randall (Quilter's Hideaway)

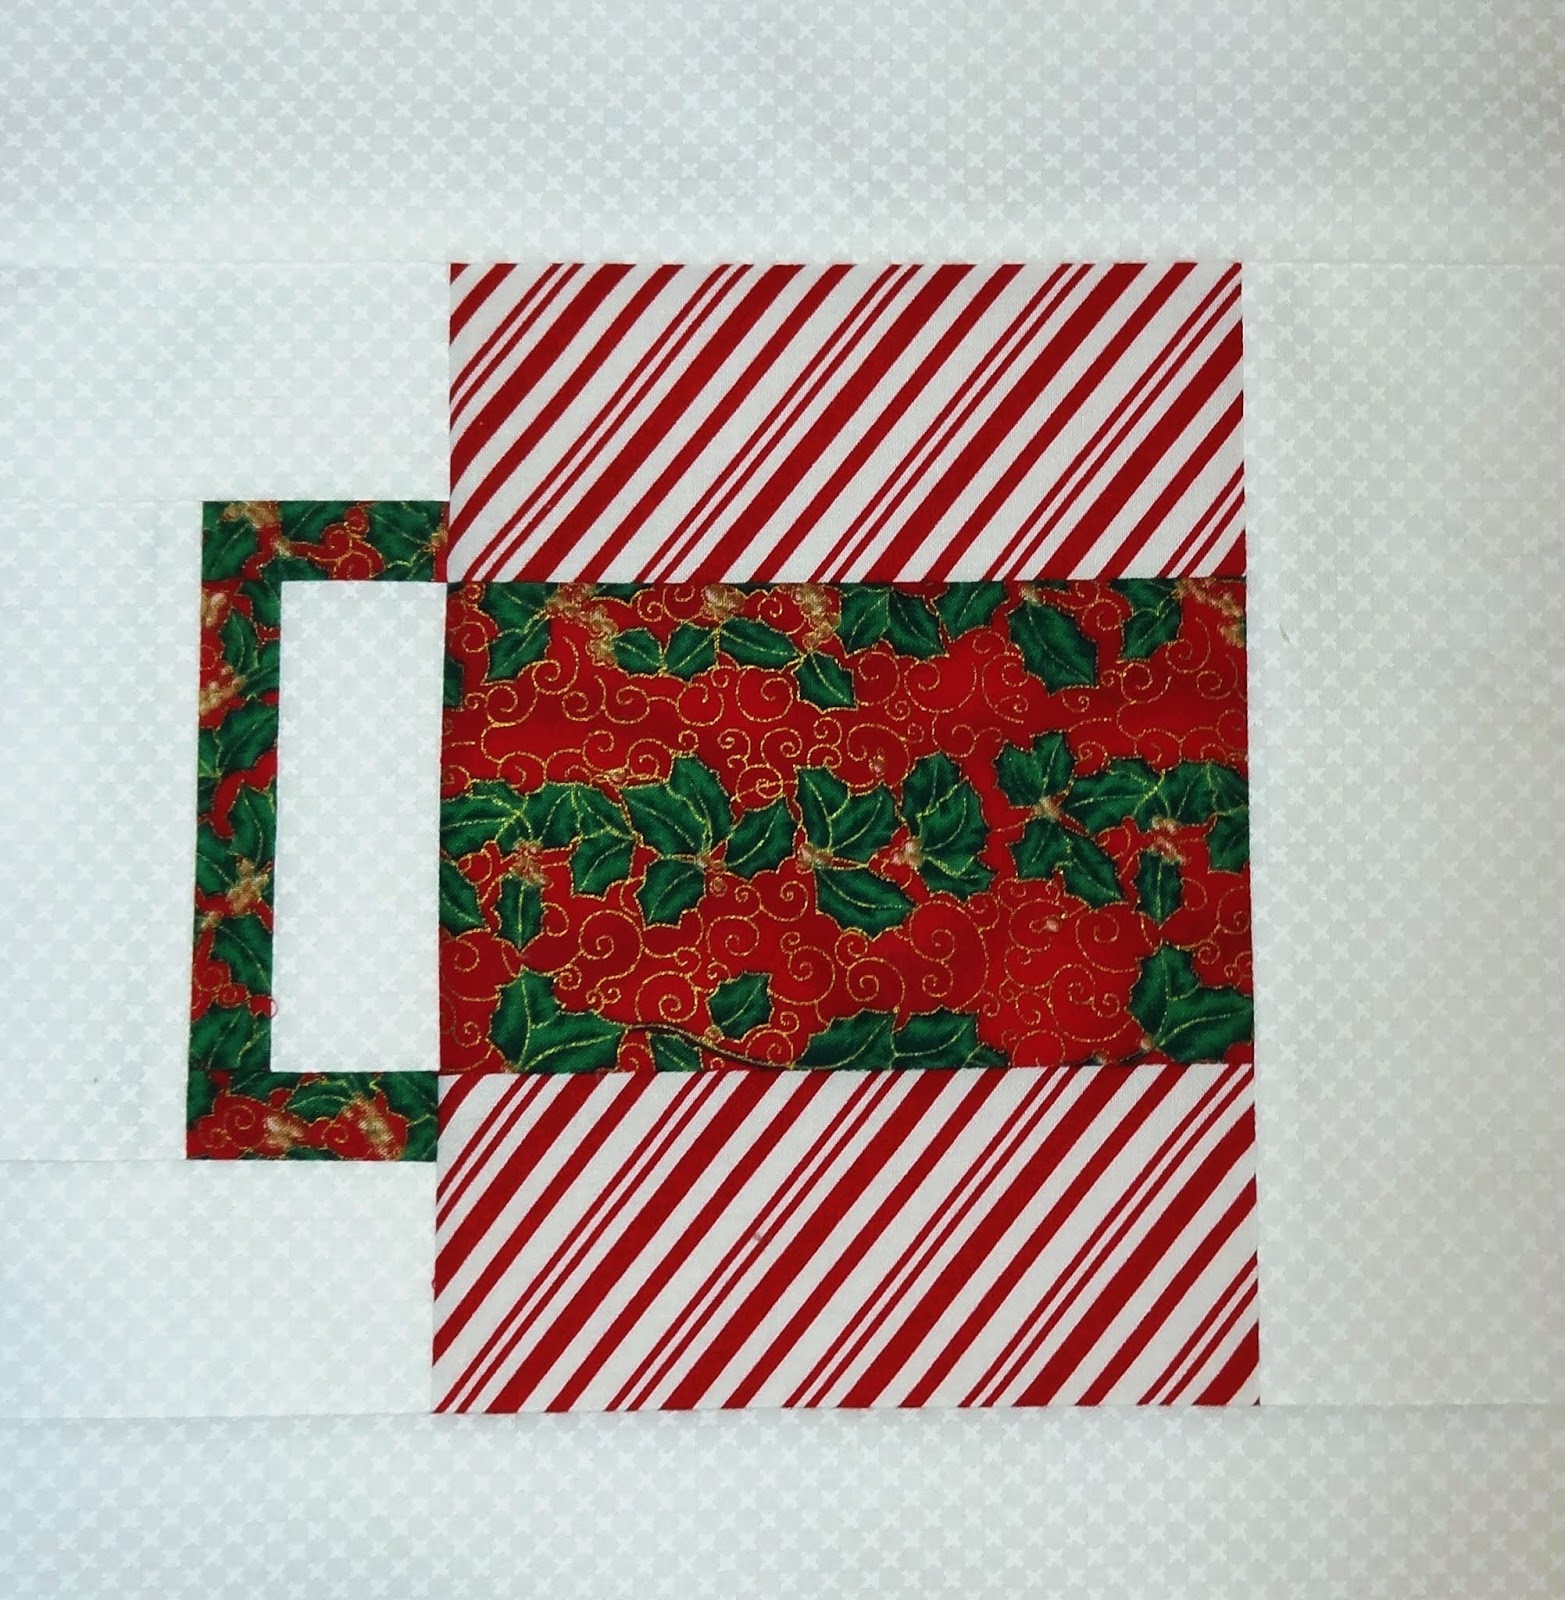
Two gingerbread guys. I may embroider some more "icing" later.    And then this week's block is


2019 Christmas Mystery
designed by Carrie Randall (Quilter's Hideaway)

A mug. I'm not sure I'm really happy with how this one worked out. I may redo it before the next clue comes out.  

Other then these three blocks, not much else got done in the sewing room. I need to get serious about getting Vintage Dresses bound or I'm not going to reach my OMG for October.  I'll get on that tonight.    

Linking up with Monday Making and Design Wall Monday. 

Sunday, October 20, 2019

Week 42 of 2019: Stitching Stuff

The tenth month of the year is winding down.  I seem to be winding down a bit with it. As the daylight ends earlier and earlier, it's harder and harder to get myself moving to the sewing room to work in even just 15 minutes of sewing time.  How about you, does the decrease in sunlight make you feel like hibernating and not stitching? 


I didn't have a stellar week on the stitching front. Life occasionally throws you curve balls and that's been the case for us this year.  My Guy has been dealing with a pretty serious medical issue for the last two months.  He had surgery last Monday and was in the hospital for a few days, part of the time in ICU. So there were a few days that stitching just didn't happen and that's OK.  In the overall scheme of things missing stitching time is pretty minor, though getting back to the sewing room has helped work off the residual stress.

15 minute days/week = 4/7 days
15 minute days/October = 16/19 days
15 minute days/2019  = 261/292 days
Success rate = 89.38%

Stitching time has been pretty limited.  There's been quite a few errands and chores on my list with My Guy on the disabled list.  I think we've taken care of most of the immediate stuff. Thankfully the cooler temps seemed to have put the grass into dormancy, so I won't have to mow again.

Though I've been getting in my 15 minutes, there's really not much to report on the stash report. So I'm going to skip that this week. 

My Guy's supposed to take long walks as part of his rehabilitation plan. Thankfully the weather has been good and we've taken the opportunity to go walk in places we normally don't.


We came across some female deer grazing along the path. They knew we are there and took off not long after I took this shot. 


There are still lots of Gulf Fritillary butterflies around, taking advantage of the last of the autumn blooms to store up a bit of nectar.

So how did your stitchy week work out? 


1. Libby in TN
2. karen
3. Julie in GA
4. Chrisknits
5. Jennifer in Indy
6. DawnyK
7. Christina's Handicrafts

Powered by... Mister Linky's Magical Widgets.

Thursday, October 17, 2019

Photography Fixes for Blogging Quilters

A few weeks ago Angie (who blogs at A Quilting Reader's Garden) asked me to share how I get my blog photos so bright and sharp.  To be honest, I've never considered my quilting photos for the blog all that wonderful. In part because there's not a lot of staging with my photos. It's pretty much lay out the blocks or the quilt and shoot. My sewing and blogging time is pretty limited these days and I'd so much rather sew.  But I do try hard to ensure that any posted photos are sharp, bright and color balanced. You'll have to be the judge of how successful I am at that. But I promised Angie I would share my tips and tricks, so here's my general process for creating most of the photos that show up on the blog.  I'm not a professional, this is what works for me, I hope it helps you get better photos for your blog.  

Basic Equipment:
     Camera
     Light
     Photoshop Elements

The camera:


 Yes I have a very nice DSLR, which sees a lot of use. But most of my sewing room photos are taken using this Sony Cyper Shot DSC-HX9V.  This point and shoot camera will be 8 years old in December. It's been dropped so many times that the lens doesn't telescope very quickly, but thankfully quilt blocks don't move very fast. My point being, you don't need a fancy, expensive camera to get good blog photos. High resolution isn't important for blog posting, but advanced shooting modes can be really helpful in producing a sharp photo. Low light and macro modes are two I use a lot. Low light mode helps reduce camera shake and macro mode allows the camera to focus at very close range, helpful when you want detail shots. 

The lighting: 

My sewing room has a very small window set back from the rest of the sewing room, so I have to make do with artificial lighting for most of my sewing photos.  Over the years I've accumulated two Slimline Floor lamps to improve the lighting over my sewing machine and my cutting table.


These aren't meant for photography, but they work really well. Both lights contain LEDs that produce light with the characteristics of natural sunlight (that's the important part as far as the photography goes).  You can get sunlight spectrum LED lights for other lamps, but they tend to be rather harsh and industrial looking when used inside, so most the interior lighting uses the softer yellow/pink/peach colored. Shooting under those lights gives the photos the same yellow/pink/peach tint. A flash will counteract most of that tinting, but at close range my point and shoot flash just over exposes the photo resulting in a washed out image. So I don't normally use the flash. 

The photo above shows my typical set up for taking pictures of large quilts in progress on the design wall.  I position the lights to get even illumination across the entire design wall.  

For things like quilt blocks, I use my sewing table and a single floor lamp.


I do use my cutting table, colored cutting mat and a floor lamp occasionally. I really like the white background in my photos, they just look cleaner to my eye. 

Here's the difference lighting can make. 


Light source is the four bulbs in the overhead ceiling fan. 

Light source is the natural daylight LEDs in the Slimline Floor Lamps

The natural daylight shot isn't as yellow, so the blocks look brighter and the colors in the photo are "truer".   My last step in the photography process is post processing, meaning I'm not posting a photo directly from the camera, but using software to further manipulate the image. 

Post Processing: Photoshop Elements

There are other tools out there you can use for post processing, but I'm going to stick with what I use and know.  As we do a fair amount of photography, Photoshop Elements makes sense for us.  It's not cheap software, but it's not outrageously expensive either.  For my blog photos, there are two post processing steps I do routinely: cropping and adjusting levels.

Cropping is pretty straight forward, typically I cut off anything that shows my messy sewing room. The second photo of the four patches was cropped from this image.  


Uncropped block photo

There's a lot of white space, and I did't get as close with this shot as I did the one lit with the ceiling lights. So I cropped to get the images to look similar and to shave off that corner sliver of black in the upper left.  

I use the Auto Levels function in Photoshop Elements frequently. That function adjusts the brightness, contrast and tonal range using the black, complete white and midtones of the photo.  


Auto Levels used to adjust brightness and tonal range

This photo is brighter than the LED image, both the white background and the fabrics. I can manually adjust the levels and tone if I'm not happy with the auto function, but that's another tutorial.  

Depending on the image, there are a few other things I might do. My sewing room lighting and camera combo does weird things to purple. If there's a lot of purple, I'll use the adjust hue/saturation function to adjust how that color shows up in the photo.  I might also straighten an image while cropping it, if I didn't get the shot lined up well. One other feature that sees some use in my blog photos is the clone stamp. That function can be used to remove stray threads from a close up or the reflection of the overhead lamp in the clear plastic part of my sewing table.


 You'll notice that circled reflection in this photo is missing from the one above.  

That's pretty much my set of blogging photo tips and tricks. There's a lot you can do with a DSLR. If you get the settings right you rarely need post processing.  But as quilting is a hobby and I'm bad enough about remembering to get in process shots, setting up a perfect DSLR shot just isn't in me most of the time and I've gotten good enough with Photoshop Elements that post processing usually takes just a few minutes (though color adjustment and removing unwanted parts of the image can take a bit of time).